Showing posts with label Breads. Show all posts

December 30, 2016

Easy and simple banana bread to celebrate five years

It’s been five years (and three months) since I started writing this blog.  I wanted to drop by in September, observe this anniversary and thank you all of you out there for reading my words and appreciating my stories and recipes.  And then things got in the way…unfortunately…  But this little space in the large blogosphere would not exist without you.  So, thank you from the bottom of my heart!  Also, I wanted to gift you this exquisite banana bread recipe, a sweet gem all the way from Maui.  


Lately, whenever I read or find anything Maui-related I stop and take notice.  That’s probably because Adrian and I made two trips to Maui in a year.  Needless to say we love Hawaii even if it would be faster to fly home to Romania than to get to this remote paradise in the Pacific. 


Everything tends to be simpler on Maui.  The moment we land, we instantly relax and embrace the slower island pace, soft sand, annoyingly clear water, lush vegetation and stunningly fiery sunsets.  Oh, and let’s not forget about the Maui specialty – banana bread – a bite of that buttery goodness and you’ll never want to leave.  We began to really appreciate banana bread on the winding and wondrous drive on the road to Hana, a town in the heart of the island’s rainforest.    
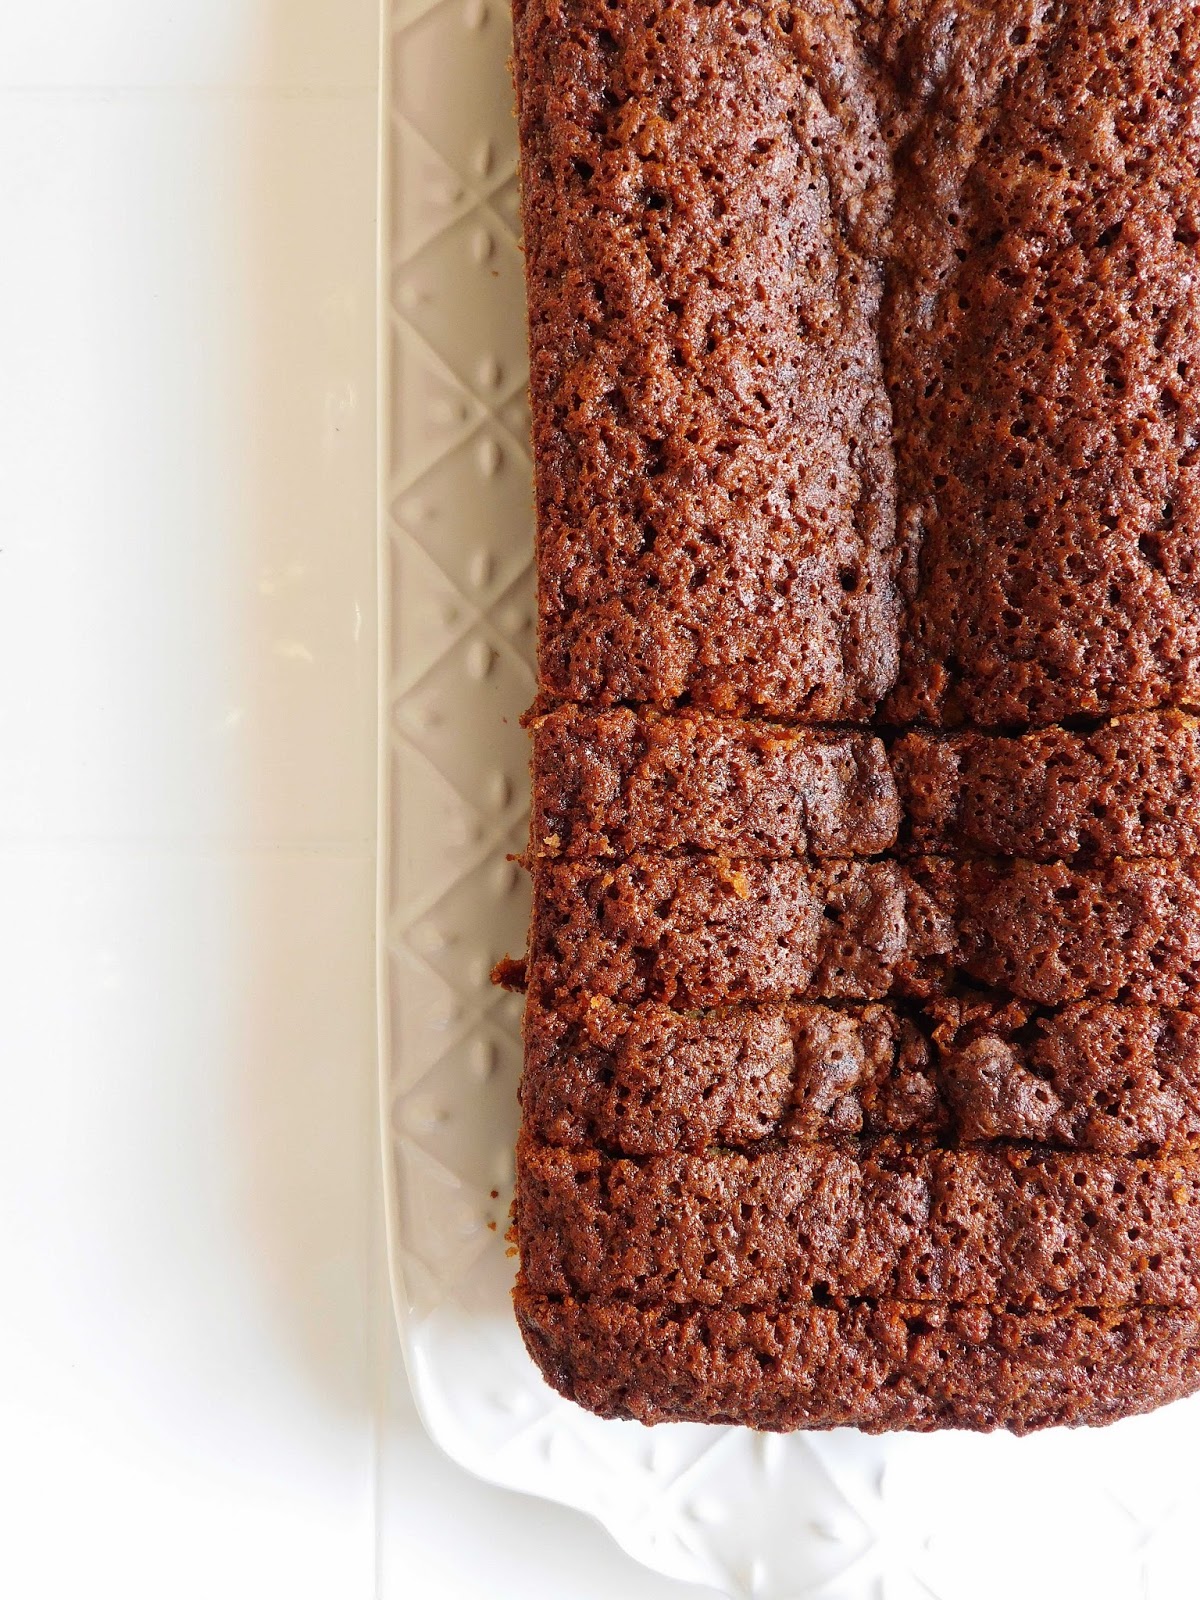


This banana bread truly captures the spirit of Maui.  Sometimes, simple is the way to go because the simplest of ingredients make for the boldest of flavors and stunning results.  This banana bread is case in point.  It is dense, spongy, moist and features a deep and elegant banana bouquet that easily envelopes the surroundings.  It is deeply decadent while highlighting basic, clean and unspoiled aromas that undoubtedly go a long way.   


It’s gutsy to refrain from tinkering with a recipe, over-embellishing and overflowing with needless ingredients.  I tried really hard to control myself from tossing in any crunchy texture or lemony zing.  But this recipe doesn’t need any of that.  The straightforward yet decadent flavor of banana shines through and makes for a wonderful dessert, snack or breakfast.  Enjoy this magical recipe and Happy New Year to everyone!


Easy and Simple Banana Bread

Adapted from Julia’s Best Banana Bread from Bon Appétit (March 2013)


Makes: 1 loaf of banana bread


Ingredients:


·         Butter for greasing the pan

·         1 ¾ cups all-purpose flour, plus more for the pan

·         1 ½ teaspoons baking soda

·         ¾ teaspoon kosher salt

·         3 large eggs

·         1 ½ cups sugar

·         1 teaspoon vanilla extract

·         1 cup mashed ripe bananas (from about 2 large bananas)

·         ¾ cup vegetable oil


Instructions:


Preheat the oven to 350° F.  Butter and flour a 9x5x3 inch loaf pan. 


Whisk flour, baking soda and salt in a medium bowl.  Whisk eggs, sugar, vanilla extract, bananas and oil in a large bowl until smooth.  Add dry ingredients to the banana mixture and stir just until combined.  Scrape batter into the prepared pan and smooth the top.


Bake until a tester inserted into the center of the bread comes out clean, about 60-65 minutes.  Transfer to a wire rack and let the bread cool in the pan for 15 minutes.  Run a knife around inside of the pan to release the bread.  Turn out onto the rack and let cool completely. 


Do ahead:  Banana bread can be made 3 days ahead.  Store airtight at room temperature.      


Poftă Bună! (Bon Appétit!)

December 20, 2012

Homemade Pretzels for Christmas

We have a famous saying in Romania: The best bird is the pig.  And that’s particularly true around Christmas when our pork consumption goes through the roof.  Yes; at Christmas whether rich or poor, we all gather around an abundant holiday table full of elaborate traditional pork dishes.  But before we dive into those popular pork concoctions we like to nibble on Homemade Pretzels to open up our appetite while we enjoy a glass of wine, mulled wine or our famous ţuică. 


Sometimes, I feel that we, Romanians, could live on bread and pretzels and nothing else year round.  If in the U.S. there’s a Starbucks on every corner, in Romania there’s a bread and pretzel shop on every corner.       


My grandmother spoils us every Christmas with an incredibly generous array of more than three hundred homemade sesame, caraway and cheese pretzels and miniature soft cheese croissants.  I’m instantly salivating just writing these words.  Since this year we won’t be home in Romania to partake in the Christmas baking spree and enjoy all that savory and sweet deliciousness that the holidays bring, I absolutely had to bake some pretzels.  I decided to skip the miniature soft cheese croissants since there’s some serious work involved but I couldn’t skip the sesame and Parmesan pretzels.


As you can imagine, I used Grandma Vicki’s recipe because it’s the one that I’m accustomed to and the one that always delivers foolproof results, which fill us with joy and keep our tummies content every Christmas.  And to my utter delight the results were indeed wonderful.  The pretzels came out of the oven perfectly golden, nicely seasoned, and spotted with sesame seeds and crunchy salt bits, and thin cheesy crust.  They were plump, crisp, crumbly, and they filled the house with that homey, warming and comforting freshly baked bread smell.  The best part, though, they were just like the pretzels my grandma baked last Christmas.  And the fact that I made them while Skypeing with my mom, who was guiding me and approving every step, made them so much more special; as if I were home baking with my mom and grandma.      


The recipe looks a bit lengthy but don’t let that intimidate you.  At the end of the day, it all simmers down to some patience and a bit of muscle for kneading the dough.  The rest will unfold on its own.  You’ll have plenty of pretzels to devour on your own for the holidays and even to give away as homemade gifts if you’d like.  Just don’t forget to dress them up.  Enjoy and Merry Christmas everyone!


Homemade Pretzels

Makes: 150 + pretzels
Special equipment: fluted pastry wheel and a pastry brush

Ingredients:

·         1 kg all-purpose flour (2 pounds 3 oz), plus more while kneading the dough
·         2 teaspoons dry instant yeast
·         400 g (3 ½ sticks) unsalted butter, at room temperature
·         1 large egg, at room temperature
·         2 teaspoons Kosher salt, plus more for sprinkling
·         About 300-350 ml (1 1/3 cups) whole milk, at room temperature
·         Sesame seeds and Parmesan cheese for sprinkling

Instructions:

Preheat the oven to 350°F.  Separate the egg yolk and egg whites.  Keep both close at hand.


In a large bowl, mix together the flour and the dry yeast.  Whisk for 30 seconds.  Add the butter and, using clean hands, gently combine it with the flour and yeast mixture until the butter absorbs the flour.  Add the egg yolk and salt and mix.  Gradually, add the milk (about 3 Tablespoons at a time), and mix well. 


Transfer the dough to a working surface.  Start kneading the dough adding a little bit of flour and milk as necessary until the dough becomes soft, elastic and pliable, and sticks together.  Knead the dough for 5-10 minutes.  Then, divide the dough into four balls and allow them to rest on the work surface for 10-15 minutes.


In the meantime, line four baking sheets with parchment paper.  Beat the egg whites and keep close at hand. 


Roll out the dough into a ¼-inch thick sheet (work with one ball of dough at a time).  The dough should be easy to work with and to roll out and should not stick to the working surface, but if you feel that it gets stuck, flour the rolling pin and working surface with some flour. 


Transfer the dough to one of the prepared baking sheets.  Using a fluted pastry wheel cut the sides of the dough to perfectly fit onto the baking sheet.  Using a pastry brush, lightly brush the dough with the egg whites.  Then, lightly sprinkle the dough with sesame seeds and salt; or with grated Parmesan cheese.  Using the fluted pastry wheel cut the dough into about 4-inch (10 cm) long and finger wide pretzel sticks.  Bake them for about 30 minutes.  Repeat with the remaining dough.


Poftă Bună! (Bon Appétit!)        

February 4, 2012

My trip to Transylvania: Part 3

I’m starting this post by telling you that last week was awful.  Adrian came down with a cold and then, when we thought he was getting better, he threw out his back.  For three days, Adrian walked tilted to the left.  He was in pain.  But that’s not all.  After Adrian’s back problem, I came down with a terrible cold.  It was so bad that last Thursday all I could do was lay on the couch covered with a wool blanket up to my nose and build up a pile of Kleenex next to me.  My eyelids could barely make it above half-mast and I felt that I needed a pair of toothpicks to hold them up to watch yet another Federer – Nadal classic, this time in the semi-final of the Australian Open.  We were a house under siege…

But, all’s well that ends well, right?  Fortunately, this week’s been better.  And it started really well when Djokovic defeated Nadal in the final of the Australian Open.  Anyway…  I don’t want to complain too much or bore you with my tennis obsessions, especially since I’d like to tell you more about my trip to Transylvania.  


After that food coma between Christmas and New Year’s, we all took a short break from anything food related.  Even the weather got better and it was a true pleasure going for a stroll on the riverbank.  That’s what I did and decided to take some pictures to show you the beautiful scenery.  You can pretty much traverse the entire city walking on the riverbank.


Our break from food didn’t last too long.  It only lasted until January 7th, when we celebrate St. John and evidently everyone named John or Joan or any other derivative.  Being a very important religious holiday in the Orthodox calendar, we had to prepare some fine dishes.  You’re probably asking: what else could we possibly eat?  We didn’t go over the top this time, but I did manage to introduce my family to an American classic: Banana Bread.  And guess what, they loved it!  


I have to admit that I was a bit skeptical since my parents are not used to the American cuisine, but, to my surprise and excitement, they all loved my Banana Bread.  The only difference from the traditional banana bread was its shape.  That’s because I baked it in a bunt cake pan, and it was worth it; it was a stunning visual.  The whole kitchen was overwhelmed with bananas and toasted nuts aromas.  And then I took it out of the oven… 


When the banana bread was ready I felt just like in My Big Fat Greek Wedding.  Do you remember the scene when Ian’s parents come to Toula’s house to meet her family, and they bring a bunt cake?  Toula’s mother doesn’t understand what it is and after a couple of confusing moments she says that’s a cake!  I made the banana bread in a bunt cake pan and it looked exactly the same.  I told my family it was banana bread, and they reacted exactly like Toula’s mother, and said, no, it’s not bread, it’s a cake!  Most importantly, they loved it.  The cake was rich, dense and moist, and oozed banana and walnut flavor.  I ended up making it several times before I left.  


Banana Bread
Adapted from Food Network Magazine (May 2011)

Serves: 10+ servings


Ingredients:

·         Butter for the pan
·         1 cup banana, mashed (about 2 large bananas)
·         1 cup walnuts, toasted and chopped
·         Optional: ½ cup raisins
·         1 ¼ cups flour
·         1 cup sugar
·         1 teaspoon baking powder
·         1 teaspoon salt
·         ½ teaspoon baking soda
·         1 teaspoon cinnamon
·         ½ teaspoon nutmeg
·         2 eggs, at room temperature
·         ½ cup vegetable oil
·         ½ cup plain yogurt or sour cream
·         1 teaspoon vanilla extract
·         1 teaspoon lemon zest
   
Instructions:

Preheat the oven to 350°F.  Lightly butter one 9-by-5-inch loaf pan.


In a medium bowl, mix the flour, sugar, baking powder, salt, baking soda, cinnamon, nutmeg and walnuts (and raisins if using).  In a large bowl, whisk the eggs, vegetable oil, yogurt, vanilla extract and lemon zest.  Stir the mashed bananas into the egg mixture.  In batches, fold in the dry ingredients until just combined. 

Spread the batter in the prepared pan.  Bake until a toothpick inserted into the center comes out clean, about 55 minutes.  Cool 15-20 minutes in the pan on a rack, then turn out onto the rack to cool completely.  When cool, dust powdered sugar on top.


Note: Instead of bananas you can also try this recipe using pears (shredded and squeezed dry), apples (shredded and squeezed dry), carrots (shredded) or zucchini (shredded and squeezed dry).

Poftă Bună! (Bon Appétit!)     

November 3, 2011

A girl on a mission

I’m a girl on a mission!  With Halloween behind us, we have officially entered the holiday season.  As a result, for the weeks to come, I will share with you inspiring recipes, which will enrich your holiday table, whether it is Thanksgiving, Christmas or your traditional Sunday dinner.  I will share with you anything from savory to sweet and everything in between, in order to add excitement, fun and deliciousness to your holidays and mine, as well.  Besides, it will also help me decide what to bring to the upcoming Thanksgiving dinner.

So let’s start then.  First, I have to say though that Halloween is one of those holidays that didn’t really have much impact on me as a European.  Fortunately, I can’t say the same thing about Thanksgiving.  As a matter of fact, I fully embraced Thanksgiving ever since my first year in the U.S., and it has rapidly become one of my favorite holidays and one that we get to spend with our family here in the States.  For the past few years, Adrian and I have been regular guests to our family friends’ Thanksgiving feast, which always brings me joy and gratitude.  Thank you Tom and Louise for making us part of your beautiful family!   


Have you heard of popovers?  You probably have.  Well… I haven’t until the November issue of the Food Network Magazine, where Alton Brown apparently shares the foolproof formula for these old-fashioned favorite delights straight from his latest cookbook, Good Eats 3: The Later Years.  I will have to take Alton’s word for it because I’ve never had popovers until his recipe, and they were phenomenal!  These popovers are light and fluffy on the inside, and perfectly crafted on the outside. 

But I’m getting ahead of myself.  When I read the article, I instantly knew that I had to try this recipe.  But first I had to buy the popover pan.  So, first thing the next morning I went in a hurry to Williams-Sonoma.  When I got to the store I couldn’t find the pan on the shelves in the baking aisle; fortunately, one of the ladies working there found extra popover pans in the back.  To be honest, I almost always have to ask the nice ladies in the store to help me find what I’m looking for because I can never find it due to the immense variety they offer; I always get lost at Williams-Sonoma because of the amount of choices and temptations, which my eyes and mind can’t handle all at once.  This time, I was a good girl; I didn’t break the bank, and only bought myself a lovely popover pan, which I couldn’t wait to put to the test.  Nevertheless, the cashier lady did ask me: “Is this all for today?  You know that we have a 15% discount on all kitchen tools, this week!”  I did take a good look around, but in the end I just said, “This is all, thank you!”  And then, the weirdest thing happened, she started telling me how she never liked popovers as a kid, but that now she did.  I suddenly started to second guess myself and wondered whether I was just impulse buying this pan, and if these popovers would only be some bland fancy looking dough.  I felt a bit strange and out of place, nodded and smiled, and hoped that she didn’t see it on my flustered face that I had never had a popover in my life. 

On my way home, I regained some of my confidence, curiosity and enthusiasm, which sent me to the store in the first place, and knew that I would bake some amazingly flavorful fancy looking dough.  And I was right!  These popovers will pop your socks off! 


Basic Popovers
Adapted slightly from Food Network Magazine (November 2011)

Makes: 6 large popovers 

Ingredients:

·         1 Tablespoon unsalted butter, melted and cooled, plus 1 teaspoon for greasing the pan
·         4 ¾ ounces (135 grams) all-purpose flour
·         1 ½ teaspoons (10 grams) kosher salt
·         2 large eggs, at room temperature
·         1 cup (250 ml) whole milk, at room temperature


Instructions:

Heat the oven to 400°F (200°C). 

Grease a 6-cup popover pan with the 1 teaspoon of butter.

Combine the 1 Tablespoon of butter, the flour, salt, eggs and milk in a food processor or blender and process for 30 seconds. 

Divide the batter evenly among the cups of the popover pan, filling each one-third to one-half full.  Bake on the middle rack of the oven for 40 minutes, taking care not to open the oven door.  Remove the popovers to a cooling rack and pierce each one in the top with a knife to allow steam to escape.  Serve warm. 


If you want to substitute your basic Thanksgiving bread basket, and go with a twist this year, these giant airy golden puffs might be the perfect option and will definitely do the trick.  These popovers are strong contenders for my big feast.  They are impressive looking (you just know that your guests and family will be jaw-dropping at first glance), and also soft, warm, moist and strikingly delicious.  And if you didn’t love them as a kid, trust me – now, it will be love at first bite!