September 25, 2012

Turning one

It was a year ago that it all began; when I timidly tossed up some words, pushed a button, and launched them out onto a big, white, empty page.  And that’s how Simply Romanesco was born!  And, now here we are, turning one.  How time flies by…  It’s been an incredible ride so far, but it would have been awfully lonely without you all here.  You, my dear readers, with your kind and encouraging words, comments, and hoorays make this journey sweet, fun, and worthwhile! 


I’ve been debating whether to celebrate my 1st blog anniversary with a dazzling, outrageously over-the-top, and imposing chocolate cake, which I made last year for Adrian’s big milestone, or with a tad less glamorous but way more delicious potato plum dumplings.  I opted for the latter.  Besides, I believe that this special occasion asks for a dessert that is deeply anchored into my upbringing and always rounds out the summer.  So, here I have for you the first recipe of the second year: Gomboţi cu Prune, or, for everyone to understand me, Potato Plum Dumplings.  


In September, the stone fruit season is on its last gasp, but it’s making for a spectacular grand finale with the arrival of the fabulous Italian prune plums.  This is when they furiously roll in with their hazy purple skin, small egg-like shape, and plump flesh.  I, for one, had been waiting for them all summer long.  Why?  To finally make these Potato Plum Dumplings.  So, I finally spotted these little gems at the Trax Farms Market, last week.  They were rapidly ripening under my eyes so when I got home I carefully stashed them in the fridge until it was time to take them out, and let the celebrations commence! 


Italian prune plums are the perfect candidate for these dumplings because they have the unique talent to easily disappear inside the dough, without having to halve or quarter them.  And when you slide your fork through a cooked hot dumpling, the surprise awaits; the meaty, saucy, and now blood orange plum oozes out; and you’re instantly lost in a cloud of sweet aromatic vapor.  And then you shower a spoonful of brown sugar over the open plum dumpling.  When you take a bite, you feel the outside coat of cinnamon perfumed crumbles, and the melting grits of sugar gently crackling under your teeth; and then the soft, mild dough happily drapes your palate, only to have the tart, slippery plum poke it with excitement.  Heaven in a bite…     


Potato Plum Dumplings
By Simply Romanesco inspired by my Grandma Vicki

Serves: 20 dumplings

Ingredients:

·         20 Italian prune plums
·         1.5 kg (3.5 pounds) potatoes
·         2 large eggs, at room temperature
·         3 teaspoons salt
·         400 grams (3 cups) all-purpose flour, plus more for dusting when forming the dumplings
·         3 Tablespoons olive oil
·         1 cup bread crumbs
·         ½ Tablespoon ground cinnamon

Instructions:

Put the potatoes in a large saucepan.  Cover with cold water, bring to a simmer, and cook over medium heat until tender for about 45 minutes.  Drain the potatoes, transfer them to a bowl, and let sit until just cool enough to handle; then peel and mash them thoroughly using a potato ricer (or a fork, or a potato masher); there should be no lumps bigger than a dime.  Let them cool completely.   


After the potatoes have cooled completely, add the eggs and salt.  Using clean hands, mix everything together.  Gradually, add the flour, and mix until thoroughly combined. 


Divide the dough into about 20 pieces the size of your fist.  Take a piece of dough at a time, dust your hands and the dough with flour so the dough doesn’t stick to your hands, and roll the dough with your hands from center to edge into a small circle.  Take a prune plum and place it in the center of the dough and gently seal it in, rolling the dough between your palms to form a ball.  Repeat with the rest of the dough. 


Meanwhile, bring a large pot of water to a boil.  Carefully, drop the dumplings in the water.  Bring to a simmer over medium-low heat.  Once the dumplings start simmering, cook them for about 20 minutes.  Occasionally, stir the water so that the dumplings don’t stick together.


In the meantime, heat up the oil in another large pan over low heat.  Add the bread crumbs and stir until they get light brown, about 2-3 minutes.  Turn the heat off, add the cinnamon, and stir well. 


When the dumplings are cooked, turn the heat off, and drain them in a colander one or two at a time, splashing them with cold water.  Transfer them to the cinnamon bread crumbs mixture and roll them around until they get coated with bread crumbs.      


When you’re about to eat a potato plum dumpling, cut it in half and sprinkle it with sugar or brown sugar, to sweeten it up.  And enjoy!


Poftă Bună! (Bon Appétit!)     

September 18, 2012

Rutabaga soup for an early fall

Yes, I know… summer is winding down.  Soon enough I’ll have to put on proper shoes, throw on a jacket, and loop a scarf around my neck.  Nope… I’m not yet ready for that; nor am I ready for hearty, rich stews that make you feel fuzzy inside and warm you up on a cool autumn evening.  I’ll try to stretch my summer wardrobe into early fall and still enjoy a refreshing summer-spirited Rutabaga Soup! 


Yes, I said soup.  You may argue that I’ve already transitioned into fall.  Well… not so much.  You see, we, Romanians, are soup eaters.  Let me say that again – we are voracious soup eaters.  (I’m actually surprised that I haven’t posted more soup recipes here.  I should revise that.)  When I’m at home in Romania, there’s not a day that goes by that I don’t stuck my face into a bowl of soup.  For us, soup is an everyday affair regardless of season, and we treat it with the utmost respect.  Sometimes, we feel that the world stops altogether if we don’t eat soup; we stop functioning, and we’re like fish out of water.  And then we get our soup fix, we regain control, and the world is suddenly a better place. 


Earlier, I called this Rutabaga Soup that I’m going to tell you about a refreshing summer-spirited soup.  Truth be told, it’s not a summer soup, winter soup, transition soup, or whatever-other-season kind of soup – it’s an all year round soup.  I just called it refreshing and summer-spirited because it refreshes me in the summer; it warms me up in autumn and winter, and wakes up my taste buds in the spring.  That’s all… 

So, here I was at the supermarket the other day treasure hunting for the two most perfect rutabagas, with one to make this colorful soup that same day, and the second to store it in the fridge until the following week for yet another rutabaga soup (by the way, rutabagas store really well in the fridge for more than a week), when an older lady asked me what I was getting.  When I said that it was a rutabaga, she followed up with “and what on earth do you use it for?” 


And then it hit me.  It’s a valid question.  What do you make with such an easy to ignore vegetable?  Few people know what a rutabaga looks like and even fewer people know what you can make with it or how to eat it.  For me as a Romanian, the most obvious way to cook a rutabaga is to turn it into a soup (or to stuff it with meat and pop it in the oven; we’ll talk about that way of cooking rutabagas another time, soon I promise).  What do you do with rutabagas?  Anyone have a killer rutabaga recipe to share?  I’d love to hear from you!


There’s something about this soup and this meek root vegetable, I’m telling you.  During the cooking process, the rutabaga sticks become tender, but not too soft; they still hold their shape, yellowish color, and delicate sweetness.  Now, the rutabaga is speaking to you; it’s not meek and shy anymore, but bold and loud.  The soup is filling, it’s filled with vegetables, it’s bright, it’s light; and then you dive your teeth into those plump egg dumplings, always a plus in my book.  You’ll go for second and third helpings in no time!  

Rutabaga Soup
By Simply Romanesco inspired by my Grandma Vicki

Serves: 8+ servings

Ingredients:

·         4 Tablespoons olive oil
·         1 rutabaga, cut into small sticks
·         3 medium carrots, peeled and grated
·         1 medium yellow onion, chopped
·         1 egg
·         All-purpose flour
·         1 egg yolk
·         3 Tablespoons sour cream
·         1 heaped Tablespoon fresh dill, chopped
·         1 heaped Tablespoon fresh parsley, chopped
·         Salt

Instructions:

In a large pan, heat the oil over medium heat.  Add the carrots, the onion and a good pinch of salt.  Cook the carrots and the onion for about 5 to 6 minutes.  Add the rutabaga sticks, a pinch of salt, and stir well.  Add ¼ cup of water and cook for about 3 to 4 minutes stirring occasionally.  Add water to fill up the pan.  Season with salt.  Bring to a boil.  Turn the heat down and simmer for about 15 minutes.  


For the dumplings:  Meanwhile, in a medium bowl, beat the egg with 1 Tablespoon of water.  Gradually add flour, 1 Tablespoon at a time, and mix well until you get a thick, sticky consistency (you’ll probably need about 5 to 7 Tablespoons of flour) to make the dumplings.


Turn the heat to medium for a gentle simmer; using a spoon, add the dumplings (about 1/8 of a teaspoon each, the dumplings will triple in size, don’t worry) to the soup.  (If the dumplings don’t immediately surface to the top, your dough may need more flour.)  Turn the heat down and cook for 10-15 minutes until the dumplings are cooked through.     

When the dumplings are cooked, turn the heat off.  In a small bowl, mix the sour cream with the egg yolk and about 1 ladle of soup; mix well.  Add the mixture to the soup and stir well.  Sprinkle with dill and parsley on top.

Note:  Let the soup cool completely before you put it in the fridge.


Poftă Bună! (Bon Appétit!)     

September 10, 2012

The omelette gets a facelift

We’re moving forward, ignoring (just for a little bit, I promise) the sinful sweets and turning to the serious savory dishes.  If until now I weren’t much of a breakfast eater, I may have converted to one…or at least to an omelette eater.  Having my parents-in-law over, we ate a lot of eggs, about two dozen eggs a week, for breakfast only.  Just between you and me, I think I’ve had my share of eggs in the morning for the rest of the year.  Anyway… The blessing about eating eggs for breakfast was that it gave me the opportunity to experiment, perfect and re-perfect an old favorite – yes, you know what I’m talking about, the vegetable omelette; and I’ve decided to put a spin on it and give it a facelift; make it fluffier and fancier!


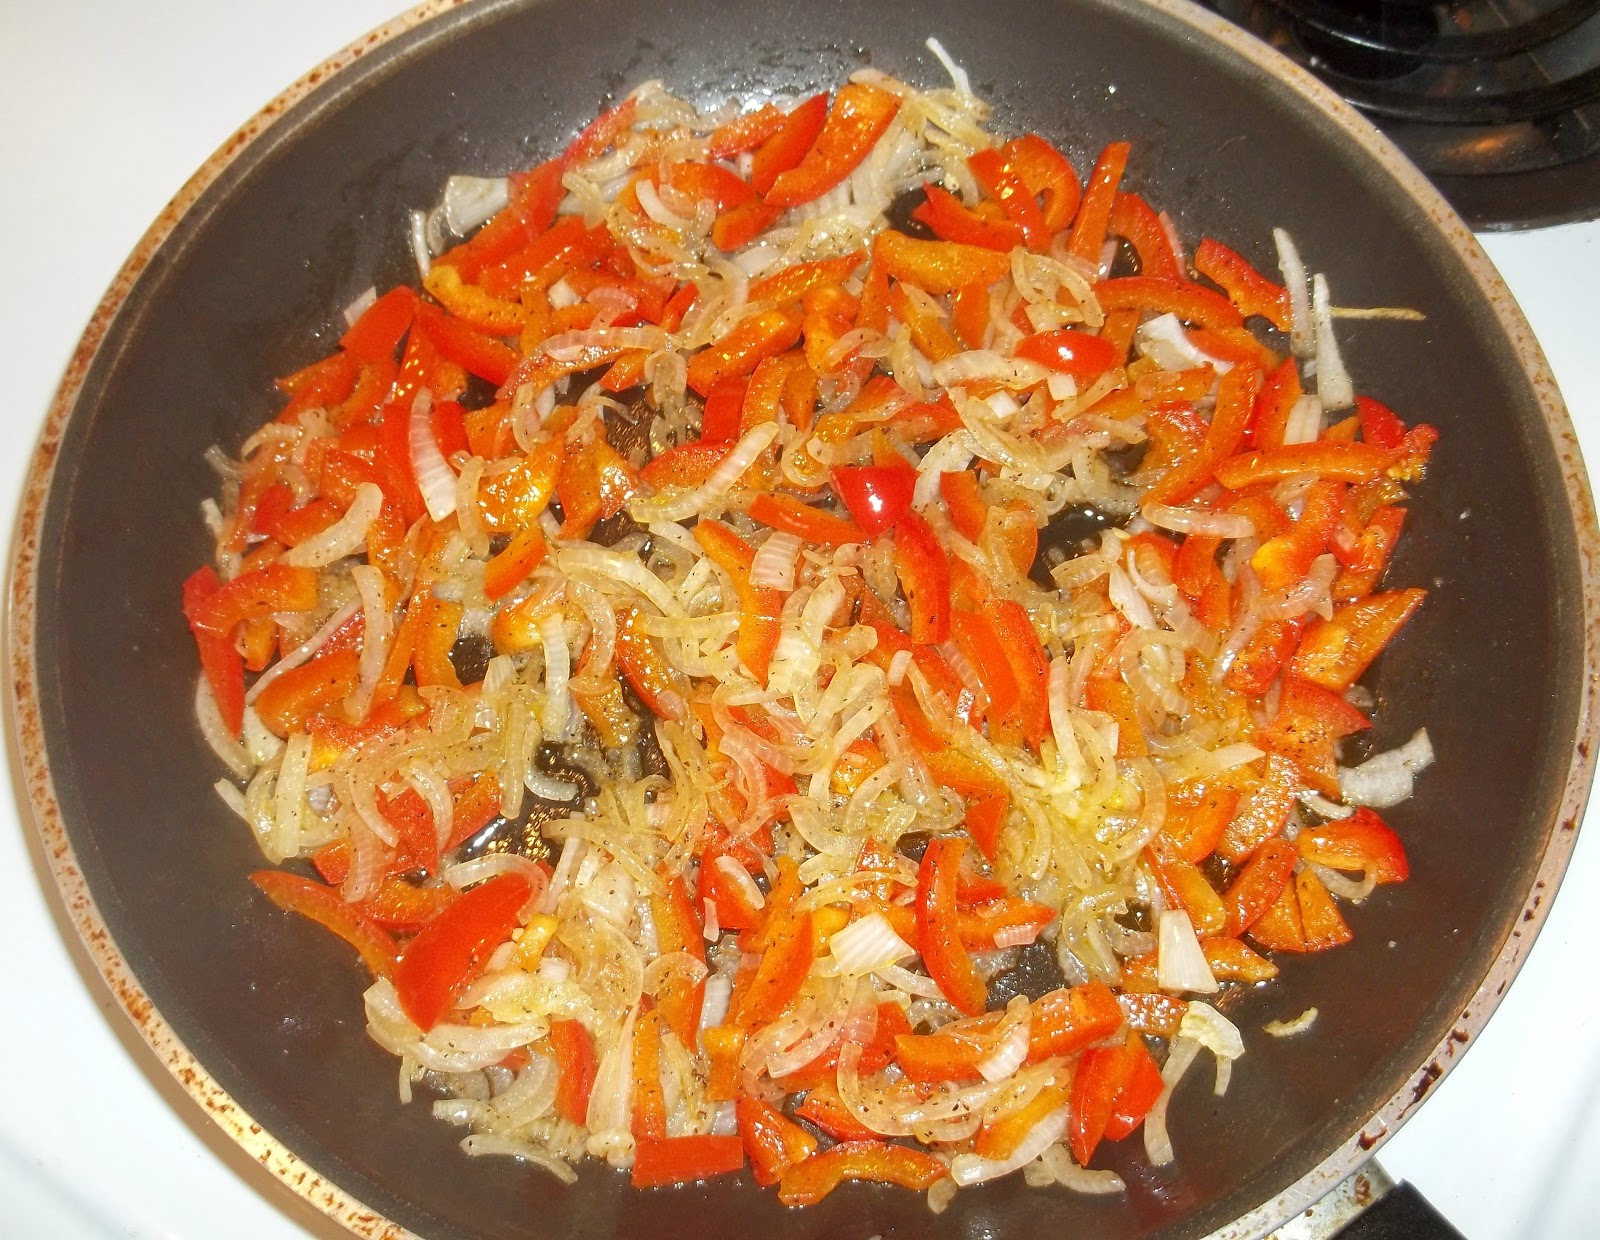
The trick to the improvement has a lot to do with the “low and slow” cooking process, the cream, and the flip (you’ll see what I mean by that in a second).  In the process, the onion loses its sharpness and strength and doesn’t make you cry any longer, but becomes sweet, soft and sort of caramelized.  The red pepper softens up and goes from sweet to sweeter maintaining though its pop of color; and the garlic (if you choose to use it) emanates only a tad of a garlicky aroma because that pungent garlic scent is forever subdued by the “low and slow” tune.  The heavy cream instead of making the omelette heavy it makes it fluffy and airy. 


And then comes the stroke of genius, the flip, which gives it that much sought-after facelift.  To be more specific, the flip means that you invert the omelette onto a plate and then slide it back into the skillet for a couple more minutes.  The procedure sounds more complicated than it actually is; all you need is a bigger plate than your skillet, some muscle, and a leap of faith!  The omelette will do the rest.


Fancy Omelette

Serves:  4 servings

Ingredients:

·         4 Tablespoons olive oil
·         1 medium yellow onion, sliced
·         1 red bell pepper, seeded and sliced
·         Optional: 1 clove of garlic, minced
·         Salt and black pepper
·         6 large eggs
·         1/3 cup heavy cream

Instructions:

Heat up the oil in a skillet over medium heat.  Add the onion and pepper, and season with a good pinch of salt and pepper.  Turn the heat down to medium-low and cook the ingredients for about 10 minutes stirring occasionally, until they become soft.  For the last 2 minutes, add the garlic if you decide to use it. 


Meanwhile, in a medium bowl, beat the eggs with the heavy cream and a pinch of salt and pepper.


Pour the eggs and heavy cream mixture over the vegetables.  Turn the heat up to medium and cook the egg mixture, without stirring, until the eggs are almost set and the bottom is golden-brown, about 5 to 6 minutes. 


Now, the fun part begins.  Turn off the stove.  Take a dinner plate, bigger than the skillet, and place it on top of the skillet.  Grab the skillet by the handle, place your other hand over the dinner plate (use kitchen mittens if the plate is too hot), go over the kitchen sink (so you don’t make a mess), and invert the omelette onto the dinner plate.  Place the skillet on the stove, turn the heat back on to medium, and slide the omelette back into the skillet and cook for 3 to 4 minutes longer.  Cut into four wedges and serve.           


Note:  Make popovers to accompany the omelette and you’ll hit this breakfast out of the ball park! 


Poftă Bună! (Bon Appétit!)

August 26, 2012

A Lemon-Berry Tart and a vote of confidence

I might be overdoing it with the desserts this summer; it feels like I don’t know anything else but sweet delights.  Still, who can resist so much ripeness and aromas, and ultimately so much fresh fruit left and right?  I know I can’t, and I want to take full advantage while they last.  And besides, there are so many different and versatile desserts to create.  Today, I have a tart for you – a Lemon-Berry Tart


Have I told you that my parents-in-law are visiting us these days?  Yep…for a short while.  So, here’s my dilemma.  When we have visitors I usually prefer to cook or bake things that I’ve already perfected or at least I’m familiar with; I don’t like stepping into unfamiliar territory and start experimenting.  But my mother-in-law is all about the innovative, the different and the odd. She wanted me to cook something new and she insisted on being my guinea pig.  Needless to say I was terrified.  My brain froze.  My entire world came to a halt.  The guinea pig job belongs to Adrian – he’s my first taster and the one who first criticizes the new recipes!  But who can argue with the mother-in-law?  So, I said a quick prayer and went for it. 


I had some extra berries leftover from yet another one of these.  And I really loved how the raspberries and blackberries turned out in the Plum-Berry Upside-Down Cake, so I thought that they might also work beautifully in this Lemon-Berry Tart.  And they did.  The tart was stunning – a glossy canary yellow lemon-flavored custard with the consistency of crystallized honey, dotted with red and dark berries, and defined by a thin mildly sweet crust.  Dreamy… 


There was some extra custard, which didn’t make it into the tart but made it into a ramekin and went into the oven next to the bubbling tart.  When we took a bite from the tiny ramekin, it was like savoring a lemon crème brulee – heavenly!  


When the tart came out, we were mesmerized.  Both my mother-in-law and I kept staring at it, hesitating to dive the knife in it and disturbing the perfection in front of us.  But we couldn’t contain our excitement and had to taste it!  The tart was so elegant, so delicate, and oh so lemony.  Sweet and sinful in one spoonful.  The tart passed the test and so did I.


Lemon-Berry Tart
Adapted from Our Best Desserts Magazine (Spring 2012)

Serves: 8-9 servings

The recipe calls for a 9-inch pie plate; I didn’t have that (but I’m planning on getting one, soon), so I used my 10-inch tart plate and it worked out perfectly.


Ingredients for the Sweet Butter Pastry:

·         1 cup all-purpose flour
·         3 Tablespoons sugar
·         ¼ teaspoon salt
·         ¼ cup cold butter

Ingredients for the Custard:

·         3 eggs, at room temperature
·         2 egg whites, at room temperature
·         ¾ cup sugar
·         1 teaspoon vanilla extract
·         ¼ cup grated lemon zest (set aside)
·         ¾ cup fresh lemon juice
·         ¼ cup butter, melted
·         1 cup fresh raspberries
·         1 cup fresh blackberries

Instructions for the Sweet Butter Pastry:

Preheat oven to 400°F. 

In a medium bowl, stir together the flour, the sugar and the salt.  Put the ingredients in a food processor and add the cold butter.  Pulse the ingredients together until the pieces of butter are pea size.  Transfer the mixture to the bowl and sprinkle 1 Tablespoon cold water over part of the mixture; toss gently with a fork.  Push moistened dough to side of bowl.  Repeat with additional cold water, 1 Tablespoon at a time (4 to 5 Tablespoons in total), until all of the flour and butter mixture is moistened.  Shape into a ball. 


On a lightly floured surface, use your hands to slightly flatten dough.  Roll dough from center to edge into a 12-inch circle.  Wrap pastry around rolling pin; unroll into a 9-inch tart or pie plate.  Ease pastry into tart or pie plate without stretching it.  Trim pastry to ½ inch beyond edge of tart or pie plate.  Fold under extra pastry.  Crimp edge as desired.  Prick bottom and side of pastry with a fork.  Line pastry with double thickness of foil.  Bake for 8 minutes.  Remove foil.  Bake for 5 to 6 minutes more or until pastry is golden.  Cool on a wire rack. 

Reduce oven temperature to 350°F.     


Instructions for the Custard:

In a large bowl, combine eggs, egg whites, sugar, vanilla extract, and lemon juice.  Beat with an electric mixer on medium to high speed until thicker and lemon colored.  Stir in melted butter and lemon zest. 


Place raspberries and blackberries in bottom of backed pastry shell.  Pour lemon mixture over berries.  Bake about 30-35 minutes or until lemon mixture is set.  Cool on a wire rack.


Poftă Bună! (Bon Appétit!)