Showing posts with label Lemon. Show all posts

August 31, 2017

Penne with Lemon, Garlic and Thyme Mushrooms

Your favorite pasta tossed with a gorgeous variety of plump mushrooms, showered with bright lemon zest and juice, sprinkled with fresh thyme and parsley, and smothered with delicious cheese.  Sounds like a scrumptious dinner, doesn’t it?  And a fantastic recipe to tell you about after a longer than expected hiatus from my dear blog. 


I want to apologize to you all for my extended leave of absence.  I haven’t fallen off the face of the earth.  I’ve been around, still trying and relishing new and tasty recipes.  But occasionally you just need a bit of a sabbatical from the things you enjoy especially when it gets harder and harder to find the time and passion to put words together, let alone stories, and burnout knocks on the door.  And sometimes, jobs, priorities, things outside of your control and life in general get in the way.  I just felt it was time to unplug for a little, long while.     


So, when life gets busy and you feel there aren’t enough hours in a day for everything you have to do, you don’t want cooking to grab a big chunk out of that limited time.  You want a few ingredients to mix together and toss them in the oven or throw them on the stove and forget about them until it’s time to smell the fabulous concoction.  This recipe is utterly fast and easy to prepare and extremely versatile.  Light yet substantial, it delivers excellent results in no time.  Enjoy! 


Penne with Lemon, Garlic and Thyme Mushrooms
Adapted from Nigella Lawson via Food52

Serves 4 to 6

1/3 cup extra-virgin olive oil
1 small clove garlic, minced
4 cups (8 ounces) finely sliced mixed mushrooms such as cremini, portabella, shiitake, oyster and chanterelle
Salt and freshly ground black pepper
1 lemon, zested and juiced
4 sprigs fresh thyme stripped to give 1 teaspoon leaves
1 pound penne pasta or other pasta shape you like
Freshly grated Parmesan, to taste (or any other cheese you have on hand or you like; I used Havarti cheese) 
1 bunch fresh flat-leaf Italian parsley, leaves chopped, to give 1/2 cup (or more if you like; I love fresh parsley so I never measure it)


Bring a large pot of salted water to a boil over high heat.  Add the pasta and cook according to packet instructions.


While pasta is cooking: Heat the oil in a large skillet over medium heat.  Add the garlic and cook for 1 to 2 minutes.  Add the mushrooms and season with salt and pepper.  Stir well and then add the lemon zest, juice and thyme leaves, and cook the mushrooms for 5 to 7 minutes until tender. 


Drain the pasta reserving about 1 cup of the pasta water.  Add the pasta to the mushroom mixture and toss well.  Add the grated cheese and toss again to coat the pasta.  Finish with the parsley and mix well.  Add the pasta water, about ¼ cup at a time, to loosen the pasta if needed. 


Poftă Bună! (Bon Appétit!)

September 12, 2013

Ginger Tea Lemonade

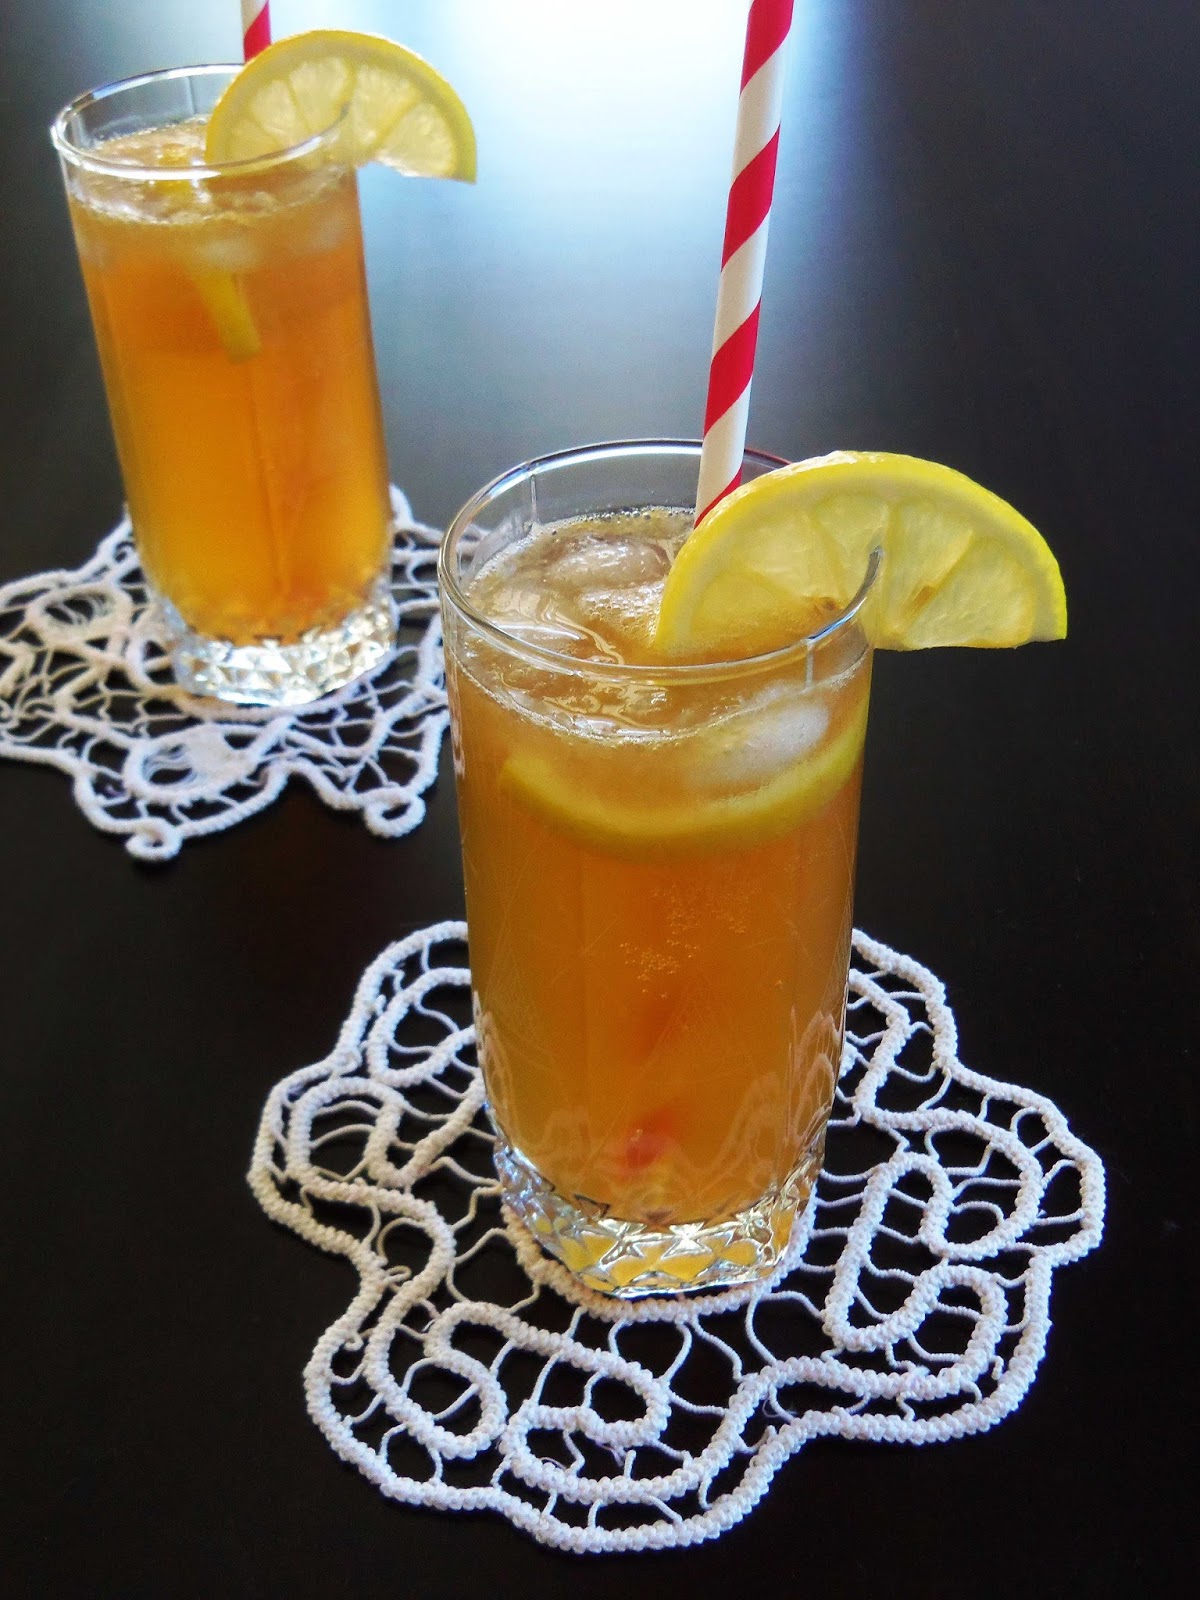
I’ve completely neglected the beverage department for a good while, which is somewhat disappointing considering that I’ve been happily sipping on this one particular drink all summer long.  But I’m here to make up for it by sharing with you the recipe for this wonderful Ginger Tea Lemonade that has kept me refreshed and hydrated throughout the scorching season.  And it’s still my non-alcoholic drink of choice stepping into fall!    


I hardly drink tea and hardly ever pay any attention to lemonade especially when it’s pink or comes in a dreadful cardboard container.  But pairing black tea with fresh lemon juice can put things in a very happy perspective!  This drink makes me want to comfortably lay by the pool at the Wynn Hotel in Las Vegas, baking under the torrid dessert sun and getting crispier by the minute, while slowly sipping this lemonade before jumping in the water to cool off.  But wait!  It was only a few days ago that I was doing just that while in Vegas!  (Except that I was actually gulping a strawberry smoothie that I’ll tell you more about another time.  But you get the idea.)


This Ginger Tea Lemonade is tea and lemonade all in one.  It’s sweet and lemony, bubbly and invigorating with a subtle spicy note from the ginger, and a full boost of energy from the black tea.  Skip the afternoon pick-me-up cup of coffee or can of soda and opt for a chilled and fizzy homemade Ginger Tea Lemonade to calm down your thirst during any season!  Cheers, everyone! 


Ginger Tea Lemonade
Adapted from Ginger Tea Lemonade by Giada De Laurentiis

Makes: 6+ servings

Ingredients for the Tea:

·         2 cups water
·         3 black tea bags
·         2/3 cup fresh lemon juice, from about 3 juicy lemons
·         Ginger Simple Syrup, ingredients and recipe follow
·         1 liter sparkling water, chilled
·         Optional: lemon slices, for garnish


Ingredients for the Ginger Simple Syrup:

·         1 cup granulated sugar
·         1 cup water
·         1 (2-inch) piece fresh ginger, peeled and chopped


Instructions for the Tea:

In a small saucepan, bring the water to a boil over high heat.  Remove the pan from the heat and add the tea bags.  Stir and allow the mixture to cool to room temperature, about 30 minutes.  Remove the tea bags and discard them. 


In a large pitcher, pour the tea mixture, lemon juice, Ginger Simple Syrup, and sparkling water.  Add the lemon slices and serve the lemonade over ice. 


Instructions for the Ginger Simple Syrup:

In a small saucepan, over medium heat, combine the sugar, water and ginger.  Bring to a boil, reduce the heat, and simmer stirring occasionally, until the sugar has dissolved, about 5 minutes.  Remove the pan from the heat and allow the syrup to cool, about 30 minutes.  Strain before using the syrup.  


Poftă Bună! (Bon Appétit!)

July 17, 2013

Fresh Goat Cheese Salad

Remember this glorious salad?  It’s funny how fast a year goes by...  What’s even more surprising is that I don’t embrace salads all that often.  It’s probably because my dominant meat lover side usually screams for decadently rich and mostly porky goodness.  But that changes significantly in the summertime.  Remember this family classic?  We eat it almost every day in the hot season.  


Last year, it felt as if we turned to the Warm Goat Cheese Salad for the sole purpose of detoxifying our bodies after a week of undeniable binge eating in Las Vegas.  But it was also because it was summer, a season when I’m instinctively inclined to get rid of the clutter and heavy food from my eating routine and make room for fresh, clean, light, and vibrant alternatives.  I’m also a goat cheese junkie.  And the chief ingredient of this salad is... you guessed... goat cheese.  On top of that, this salad is good, really good!  Yet, I felt that it needed some tweaking and a new spin to make it utterly delicious.    


My new version of the salad, the Fresh Goat Cheese Salad, is a riff on the Barefoot Contessa favorite without the fried element and with a couple of extras.  It’s a snap to assemble; uses only simple and unspoiled ingredients, and I find it to be more suited for the scorching heat than its sister.  Still, the salad is abundant in textures and lovely flavors.  The raisins give it a pleasantly sweet chewiness; the walnuts bring a toasty crunchiness; the goat cheese makes it hearty and creamy; while the drizzle of light homemade lemony dressing adds a touch of acidity.  A no muss, no fuss colorful summer salad, so graceful in its simplicity you’ll be eating it all season long!


Fresh Goat Cheese Salad
Inspired by Salad with Warm Goat Cheese by Barefoot Contessa

Makes: 6 servings

Ingredients:

·         6-7 cups mixed salad greens
·         ½ cup golden raisins
·         Heaped ½ cup toasted walnuts, roughly chopped
·         4 ounces goat cheese, crumbled
·         Juice of 1 large, juicy lemon
·         ½ teaspoon salt
·         ¼ teaspoon black pepper
·         ¼ cup olive oil
·         Optional: freshly ground black pepper


Instructions:

To toast the walnuts:  Preheat the oven to 350°F.  Spread the walnuts on a large baking sheet.  Roast the nuts in the oven for about 10-12 minutes.  Allow them to cool completely. 


Place the mixed salad greens in a large bowl.  Add the golden raisins, walnuts, and goat cheese. 

For the dressing:  In a small bowl, whisk together the lemon juice, salt and pepper.  Slowly pour in the olive oil, whisking constantly until the dressing thickens slightly.  


Pour the dressing over the salad and toss well to combine.  Divide the salad among plates and add more freshly ground black pepper if desired.    


Poftă Bună! (Bon Appétit!)

January 25, 2013

Orange-Lemon Ice Cream

Don’t you just love homemade ice cream?  I know what you’re thinking; here we are, shivering in single-digits temperatures and talking about ice cream.  That sounds kinda out of place but no cold season will ever keep me away from ice cream.  After all, it’s summer in the southern hemisphere! 


Truth be told, I’m a bit of a lost case when it comes to ice cream; I usually avoid stuffing the freezer with this temptation since I’m pretty shameless once I get my paws on it; and I could eat it by the ladle and finish the container in one sitting!  Ice cream has that effect on me.  It goes without saying that after I’m done I’m left with a mountain of regret for not being able to control myself.  What can I say – I’m not perfect. 


Anyway…  For someone who loves ice cream as much as I do it took me forever to get serious and finally take a stab at making my own.  So on Black Friday, we acquired an ice cream maker.  Hooray!!!  It had been on my to-buy list for quite a while. 


Now, you would think that I immediately made tons of ice cream once we got it.  Not so much… In fact, the poor thing is still comfortably sitting in the box.  Yep… I have yet to take the ice cream maker out of its box.  Shame on me!  But that hasn’t stopped me from making homemade ice cream.  Which brings me to my next point: sometimes, there’s no stirring, churning or an ice cream maker required to create wonderful homemade ice cream.  And this fantastic Orange-Lemon Ice Cream is here to prove it.


I don’t even know where to begin.  Maybe I should start by telling you that there are only four ingredients in this recipe.  FOUR!  But that doesn’t emphasize how magnificent this ice cream is.  It’s so stunningly delicious, creamy and smooth yet light at the same time with brightly colorful orange and lemon specks that enrich the lovely texture.  One spoonful and your mouth will be coated in an explosion of glorious and sweetly citrusy aroma.  This ice cream is splendid on its own and it’s also a ravishing topper for any bread pudding or a slice of warm, moist cake or whatever dessert you might want to dress up.


Orange-Lemon Ice Cream
Adapted from Nigella Bites by Nigella Lawson

Serves:  8 servings


Ingredients:

·         1 large orange
·         2 lemons
·         1 cup plus 2 Tablespoons confectioners’ sugar
·         2 ½ cup heavy cream

Instructions:

Grate the zest of the orange and one of the lemons.  Squeeze the juice of the orange and the two lemons and pour into a large bowl with the zest and confectioners’ sugar.  Stir to dissolve the sugar and add the heavy cream.


Using an electric mixer on low speed, whip everything until it holds soft peaks.  Pour into a shallow airtight container (of approximately 2 quarts) with a lid.  Cover and freeze until firm (from 3 to 5 hours).  Remove to ripen for 15-20 minutes (or 30-40 minutes in the refrigerator) before eating.  Serve in a bowl, in cones, with wafers – however you like.  


P.S.:  I do solemnly promise to take the new ice cream maker out of the box and use it to make fancy superb ice cream before too long.


Poftă Bună! (Bon Appétit!)       

August 26, 2012

A Lemon-Berry Tart and a vote of confidence

I might be overdoing it with the desserts this summer; it feels like I don’t know anything else but sweet delights.  Still, who can resist so much ripeness and aromas, and ultimately so much fresh fruit left and right?  I know I can’t, and I want to take full advantage while they last.  And besides, there are so many different and versatile desserts to create.  Today, I have a tart for you – a Lemon-Berry Tart


Have I told you that my parents-in-law are visiting us these days?  Yep…for a short while.  So, here’s my dilemma.  When we have visitors I usually prefer to cook or bake things that I’ve already perfected or at least I’m familiar with; I don’t like stepping into unfamiliar territory and start experimenting.  But my mother-in-law is all about the innovative, the different and the odd. She wanted me to cook something new and she insisted on being my guinea pig.  Needless to say I was terrified.  My brain froze.  My entire world came to a halt.  The guinea pig job belongs to Adrian – he’s my first taster and the one who first criticizes the new recipes!  But who can argue with the mother-in-law?  So, I said a quick prayer and went for it. 


I had some extra berries leftover from yet another one of these.  And I really loved how the raspberries and blackberries turned out in the Plum-Berry Upside-Down Cake, so I thought that they might also work beautifully in this Lemon-Berry Tart.  And they did.  The tart was stunning – a glossy canary yellow lemon-flavored custard with the consistency of crystallized honey, dotted with red and dark berries, and defined by a thin mildly sweet crust.  Dreamy… 


There was some extra custard, which didn’t make it into the tart but made it into a ramekin and went into the oven next to the bubbling tart.  When we took a bite from the tiny ramekin, it was like savoring a lemon crème brulee – heavenly!  


When the tart came out, we were mesmerized.  Both my mother-in-law and I kept staring at it, hesitating to dive the knife in it and disturbing the perfection in front of us.  But we couldn’t contain our excitement and had to taste it!  The tart was so elegant, so delicate, and oh so lemony.  Sweet and sinful in one spoonful.  The tart passed the test and so did I.


Lemon-Berry Tart
Adapted from Our Best Desserts Magazine (Spring 2012)

Serves: 8-9 servings

The recipe calls for a 9-inch pie plate; I didn’t have that (but I’m planning on getting one, soon), so I used my 10-inch tart plate and it worked out perfectly.


Ingredients for the Sweet Butter Pastry:

·         1 cup all-purpose flour
·         3 Tablespoons sugar
·         ¼ teaspoon salt
·         ¼ cup cold butter

Ingredients for the Custard:

·         3 eggs, at room temperature
·         2 egg whites, at room temperature
·         ¾ cup sugar
·         1 teaspoon vanilla extract
·         ¼ cup grated lemon zest (set aside)
·         ¾ cup fresh lemon juice
·         ¼ cup butter, melted
·         1 cup fresh raspberries
·         1 cup fresh blackberries

Instructions for the Sweet Butter Pastry:

Preheat oven to 400°F. 

In a medium bowl, stir together the flour, the sugar and the salt.  Put the ingredients in a food processor and add the cold butter.  Pulse the ingredients together until the pieces of butter are pea size.  Transfer the mixture to the bowl and sprinkle 1 Tablespoon cold water over part of the mixture; toss gently with a fork.  Push moistened dough to side of bowl.  Repeat with additional cold water, 1 Tablespoon at a time (4 to 5 Tablespoons in total), until all of the flour and butter mixture is moistened.  Shape into a ball. 


On a lightly floured surface, use your hands to slightly flatten dough.  Roll dough from center to edge into a 12-inch circle.  Wrap pastry around rolling pin; unroll into a 9-inch tart or pie plate.  Ease pastry into tart or pie plate without stretching it.  Trim pastry to ½ inch beyond edge of tart or pie plate.  Fold under extra pastry.  Crimp edge as desired.  Prick bottom and side of pastry with a fork.  Line pastry with double thickness of foil.  Bake for 8 minutes.  Remove foil.  Bake for 5 to 6 minutes more or until pastry is golden.  Cool on a wire rack. 

Reduce oven temperature to 350°F.     


Instructions for the Custard:

In a large bowl, combine eggs, egg whites, sugar, vanilla extract, and lemon juice.  Beat with an electric mixer on medium to high speed until thicker and lemon colored.  Stir in melted butter and lemon zest. 


Place raspberries and blackberries in bottom of backed pastry shell.  Pour lemon mixture over berries.  Bake about 30-35 minutes or until lemon mixture is set.  Cool on a wire rack.


Poftă Bună! (Bon Appétit!)